Recall from post IIA that the two classes we will focus on most are TreeItem and TreeModel. We'll start with TreeItem.
Each instance of TreeItem represents a node in our data tree, and we will bind multiple such items together into a hierarchical representation of all the data in our data set. As we will see, each node contains the text from one row of the model, as well as information about that node's relationship to other nodes in the tree.
The TreeItem class is defined as follows:
1 2 3 4 5 6 7 8 9 10 11 12 13 14 15 16 17 18 19 20 21 22 23 24 25 26 27 28 29 30 31 | class TreeItem(object): def __init__(self, data, parent=None): self.parentItem = parent self.itemData = data self.childItems = [] def appendChild(self, item): self.childItems.append(item) def child(self, row): return self.childItems[row] def childCount(self): return len(self.childItems) def columnCount(self): return len(self.itemData) def data(self, column): try: return self.itemData[column] except IndexError: return None def parent(self): return self.parentItem def row(self): if self.parentItem: return self.parentItem.childItems.index(self) return 0 |
When instantiated, a TreeItem receives two inputs: data (a two-element list of strings) and parent (which is typically another TreeItem):
def __init__(self, data, parent=None):
    self.parentItem = parent
    self.itemData = data
    self.childItems = []
Each TreeItem stores important data about its node. As illustrated in Figure 4, each node contains a full row of data, which consists of two columns (the title and summary). This columnar data is contained in itemData as a two-element list of strings.
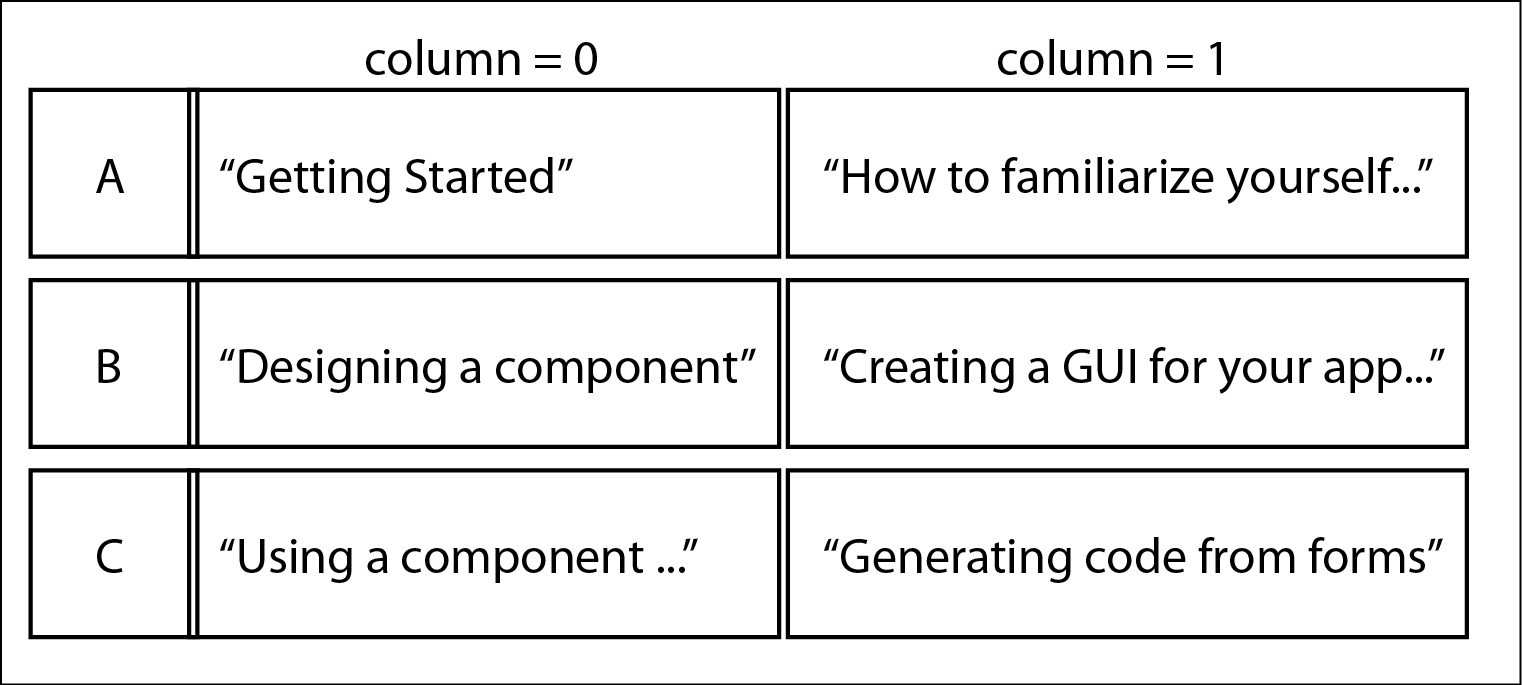 |
| Figure 4: Each TreeItem represents a row of the model The diagram depicts how the title and summary information are stored in TreeItems A, B and C. Each TreeItem represents a row of data. The itemData attribute is a list that contains the data from each column. For instance, B.itemData[1] contains the string "Creating a GUI for your application." |
In addition to storing an item's first-order data in itemData, each TreeItem also contains attributes that specify the item's place in the tree structure. Namely, it includes the item's parent (parent) as well as a list of the item's children (childItems). We can fully specify our tree's topography by appropriately setting these attributes for each node.
We can build our data tree using a simple and intuitive construction procedure. First, create the root TreeItem, which is the node with no parents. That is, the root item is the ancestor of all nodes in the tree, but a child of none:
rootItem = TreeItem(["Title", "Summary"], parent = None)
Note that the root's itemData contains the model's horizontal header data, but this is just for convenience: we could just as easily have sent it two empty strings. To attach children to the root item, we call TreeItem again, but with rootItem as the parent:
child0 = TreeItem(["Getting Started", "How to familiarize yourself..."], rootItem)
child1 = TreeItem(["Designing a component", "Creating a GUI for your app..."], rootItem)
Then, to add a child to one of these items, for instance to give child0 a child, we would follow the exact same procedure:
child00 = TreeItem(["Launching designer", "Running the Qt Designer app..."], child0)
Such iterative construction of TreeItems is all we need to generate our tree's basic skeleton, like the one illustrated in Figure 5.
 |
| Figure 5: The tree is built out of TreeItems. TreeItems are connected together into a tree. As described in the text, we start with the root item, and proceed from there, instantiating new TreeItems with the root item as the parent, iterating this process until we have constructed the entire tree. Each item's row number, relative to its siblings, is indicated to the right. |
There is one more step we must take to finish building our basic tree: we must fill in values for the childItems attribute. You probably noticed that when initialized, the childItems list started out empty. Once we have a population of TreeItems connected appropriately, we can use TreeItem.appendChild() to populate childItems:
def appendChild(self, item):
    self.childItems.append(item)
For instance, to add the children to the items defined above:
rootItem.appendChild(child0)
rootItem.appendChild(child1)
child0.appendChild(child00)
Once we have appended all the children to each item, then we are done building the tree! This tree structure serves as the data store with which our model will directly interact.
Note that the simpletreemodel example is a read-only model, so once the tree is grown it is frozen in place: its topography never changes. Hence, we will see (Part III) that appendChild() is only used in one place in our code: when initially constructing the tree with setupModelData(). Therein, creating a node and appending it to its parent are done in one line. For instance:
rootItem.appendChild(TreeItem(["Getting Started", "How to familiarize yourself..."], rootItem)
This line carries out the same operations as above, but in a more compact way.
If building a tree was our only goal, we would be done. But we want to display this tree using PySide. Since our model will need to provide certain methods for use by the view, we supplement each TreeItem instance with some additional methods that will help us build the model in Part III. We'll briefly look at each of these methods in Post IID.
But first, as an aside in Post IIC, we will briefly discuss other ways we might build a tree in PySide.
No comments:
Post a Comment